How to Create a Budget-Friendly Caster Setup for Esports Broadcasting
Esports broadcasting has grown immensely in recent years, with professional-looking streams being a key factor in attracting viewers and sponsors. However, you don't need a massive budget to create a high-quality broadcast setup for your esports content.
In this guide, we'll walk through the essentials and talk about camera setup, lighting, microphones, and soundproofing to help you create a professional-looking esports stream without breaking the bank.
1. Camera Setup: Clarity on a Budget
Your camera is one of the most crucial components for a professional esports broadcast. While high-end cameras like DSLRs or mirrorless models offer incredible video quality, budget options can also produce excellent results.
Camera Options:
- Webcams: A good-quality webcam can go a long way. The legendary Logitech C920($79) is still a viable camera today or if you want to get a more recent release you also have the Elgato Facecam($129). Both of these cameras offer HD streaming at 1080p, providing clear and sharp visuals for esports streams at a budget price.
- Smartphone Cameras: Modern smartphones have excellent cameras that can double as your streaming camera and often is better quality than most any web camera you could purchase.
- Apps & Services like vdoNinja, DroidCam or EpocCam, can turn your phone into a high-quality webcam for minimal cost.
Placement and Framing:
- Position the camera at eye level for a natural perspective.
- Use a tripod or a sturdy stand to avoid shakiness.
- Center yourself or the players in the frame, keeping the focus on the subject with a tidy, distraction-free background.
- Avoid casting from a cluttered space, such as an unmade bed with scattered clothes, as this appears unprofessional. Opt for a clean, organized setting to enhance your on-screen presence.
2. Lighting: The Secret to Professional-Looking Streams
Good lighting can significantly enhance your camera's output, making even a budget webcam look professional. You may be able to avoid purchasing a new camera by simply adjusting your lighting. The key to lighting is achieving soft, even light that eliminates harsh shadows.
Budget Lighting Options:
- Ring Lights: These affordable lights provide soft, even lighting that is ideal for face cams. Ring lights like the Neewer 18-inch are a staple for many streamers.
- Softboxes: If you need broader lighting, softboxes are a great option. They diffuse light over a larger area, providing smooth, flattering illumination. Options like the MountDog Softbox Lighting Kit are inexpensive and effective.
- DIY Lighting: If you're really on a budget, you can create soft lighting using household lamps. Place a white sheet or paper over the light to diffuse it, creating a softer effect.
Safety Note: Always ensure that any DIY lighting solutions are safe and do not pose a fire risk. Consider LED lights instead of traditional bulbs.
Lighting Techniques:
- Three-Point Lighting: This is a simple yet effective technique that uses a key light, fill light, and backlight to create a balanced look.
- Key Light: Place this as your primary light source on one side of your face.
- Fill Light: Set up another light on the opposite side to soften shadows.
- Backlight: Use a light behind you to separate yourself from the background and add depth.
3. Microphones: Clear Sound on a Tight Budget
Audio quality is just as important as video, if not more so. Viewers will tolerate lower video quality, but poor audio can drive them away. Investing in a good microphone is essential, but you don't have to spend a fortune.
Budget Microphone Options:
- USB Microphones: USB mics like the Blue Snowball or FIFINE K669B provide excellent audio quality at a budget-friendly price, making them popular choices for streamers.
- Lavalier Mics: Although not commonly used in online stream production, these clip-on microphones are discreet and affordable, and can often be used with smartphones or cameras. The Boya BY-M1 is a solid choice.
- Headset Mics: If you're tight on space and budget or already have one, a gaming headset with a built-in microphone like the HyperX Cloud II can offer decent sound quality for both communication and streaming.
Tips for Better Audio Quality:
- Position the mic correctly: Keep the mic close to your mouth (but not too close to avoid distortion) for clear audio capture.
- Typically 2-6 inches away: This distance helps capture your voice clearly while minimizing background noise.
- Use pop filters: These filters reduce plosive sounds like "p" and "b" that can distort audio.
- Noise reduction software: Programs like NVIDIA Broadcast or Krisp(Discord) can help filter out background noise, ensuring your voice is the primary focus.
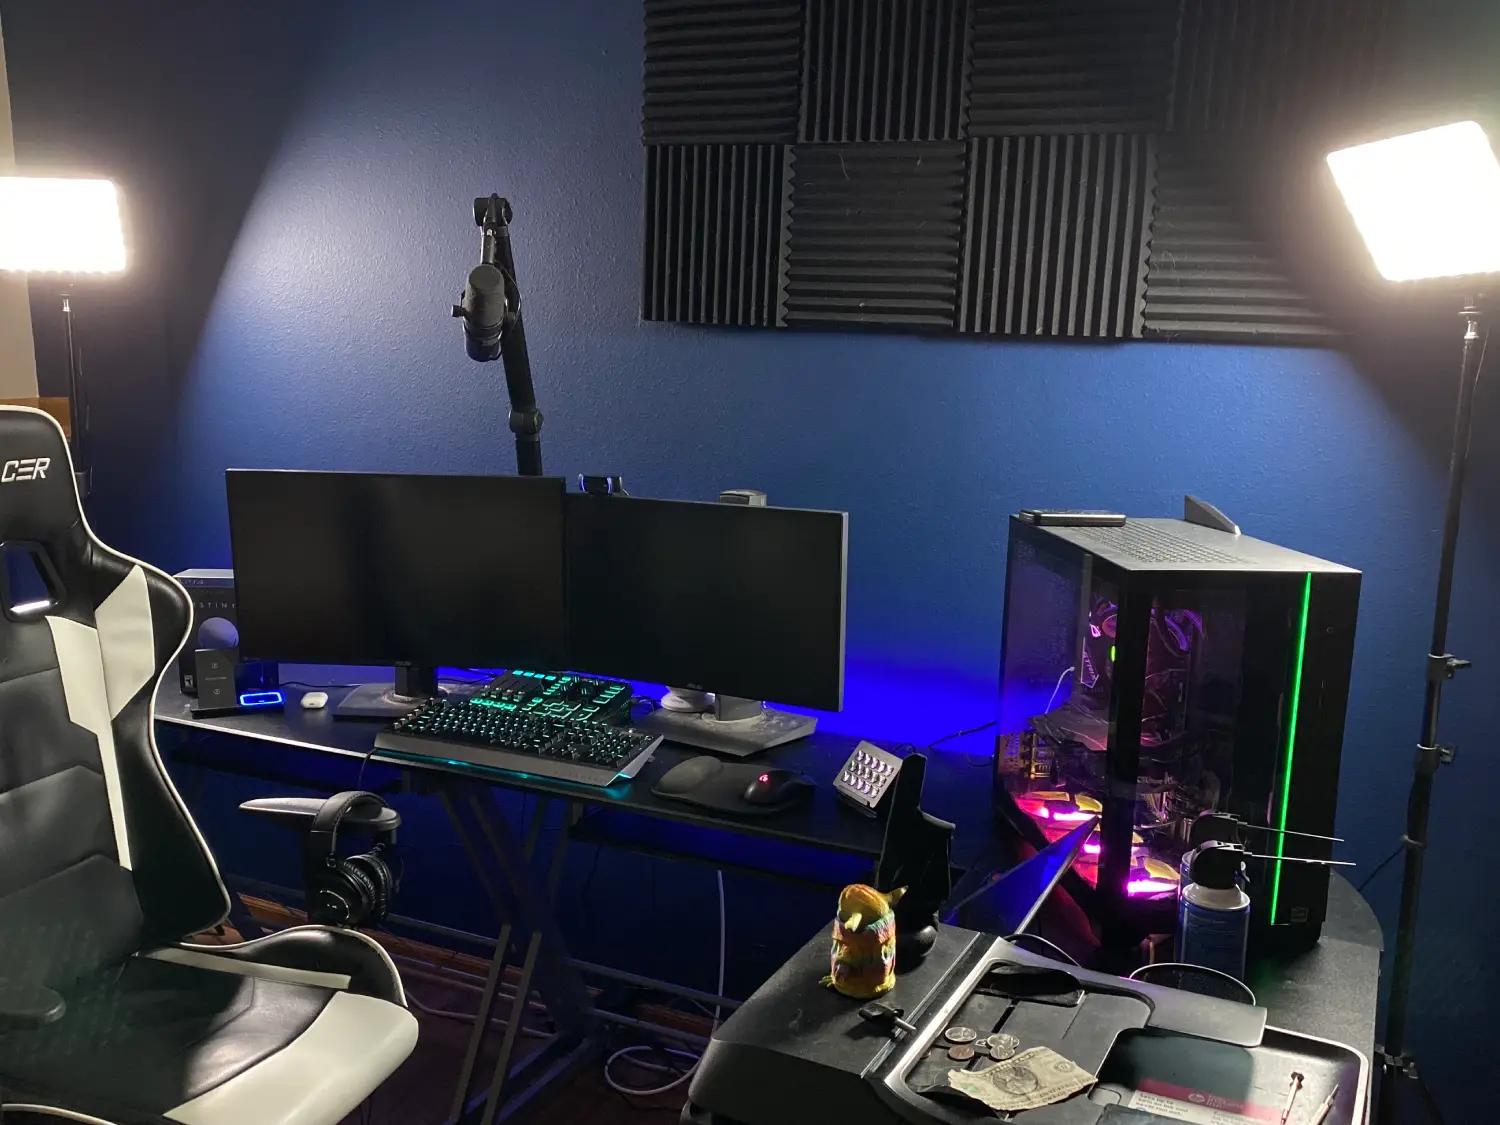
4. Soundproofing: Minimize Distractions for a Clean Audio Experience
Nothing ruins a professional broadcast faster than distracting background noise. Soundproofing your space is crucial, but it doesn't have to be costly.
An empty room with hard surfaces will create echoes, while a room with furniture, curtains, and carpets will naturally dampen sound.
Affordable Soundproofing Solutions:
- Acoustic Foam Panels: These are the go-to for soundproofing. They absorb echoes and reduce room noise, improving audio clarity. You can find inexpensive foam panels on Amazon, or even try egg crate foam as a DIY alternative.
- Heavy Curtains or Blankets: Thick materials like curtains or blankets can help block outside noise and reduce echo. Hang them behind your camera or on walls for a budget-friendly solution.
- Rugs and Carpets: Hard floors can cause audio reflections, but adding a rug or carpet can help absorb sound and reduce echo.
- Typical Household Items: Bookshelves, furniture, and even clothes can help dampen sound. This is simply due to sound waves being absorbed by these items rather than bouncing off empty walls.
Noise Control Tips:
- Stream from a quiet room, away from noisy appliances or street noise if possible.
- Consider turning off fans or air conditioners that create constant background hum.
- You can use software noise gates (available in software like OBS Studio via filters and also inside of VoiceMeeter) to help cut out background noise when you're not speaking.
Tips:
- Always test your camera feed & audio before sending feeds.
- Use a wired internet connection when possible, WiFi can introduce latency and instability and is not recommended for professional broadcasting.
- Close unnecessary applications to preserve your computer's resources.
The beauty of this setup is that you don't need complex streaming software - the producer handles all the technical broadcasting while you focus on delivering great commentary.
TLDR: Budget-Friendly Professional Caster Setup
Creating a professional looking caster broadcast setup on a budget is completely achievable with the right strategy. Start by focusing on key areas like camera quality, lighting, audio, and soundproofing. Each piece of the puzzle plays a role in making your stream look and feel more professional, helping you stand out in the crowded esports streaming world. By investing in affordable yet effective equipment and techniques, you can create a high-quality broadcast setup that attracts viewers and sponsors alike. Remember, the key is to start with what you have and gradually improve your setup as your channel grows.
Summary
- Camera: Use a decent webcam like Logitech C920 ($79) or your smartphone with DroidCam/EpocCam
- Lighting: Invest in ring lights or softboxes; proper lighting makes even budget cameras look professional
- Audio: A quality USB mic like Blue Snowball offers clean sound without breaking the bank
- Soundproofing: Use acoustic panels, blankets, or everyday items like bookshelves to reduce echo
- Software: OBS Studio is free and provides all the essential features for professional broadcasting